Wednesday, 21 September 2011

Tau Yu Bak - Belly Pork Braised in Soy Sauce


A few friends who came to the UK around the same time I did have mused that there were several dishes from back home that they didn't like at all prior to making their way here, but have since changed their minds and miss it just as much as their favourites. As I grew up, I remembered not looking forward to dinner when I learnt that my mother had cooked tau yu bak, but have since acquired a taste for it and do miss it when in the UK.

To make the dish, whole slabs or bite-sized pieces of belly pork (the same cut used to make streaky bacon) are braised in soya sauce with Chinese mushrooms and an assortment of typical Chinese spices - cinnamon, cloves, star anise, fennel and ginger, though the concoction might vary - for about an hour. The meat is tender and has a small amount of fat that provides a flavourful punch. Typically this is served with rice.

Given that the preparation is relatively simple, it is surprising that while I was here none of the households I was in ever prepared it. I guess we were content with stir-fries for typical meals, reserving special occasions for the likes of laksa, chicken rice and chilli crab. When Sainsbury's introduced a Basics version of pork streaky rashers, belly pork in another guise, I thought I might as well give this a go for nostalgia. A quick Google search also showed that not everybody in the UK knew what to do with this, so this blog post might be of interest to curious British readers.


Since I was planning to cook for my flatmates as well I bought the regular rashers. The photo above shows a side-by-side comparison. The two rashers below are the Basics ones, while the two above are regular Sainsbury's.

To make this, I used the recipe taken from NoobCook, written by a fellow countrywoman. Due to ingredient scarcity, I left out the mushrooms and resorted to using ground versions of the spices she listed as well as granulated sugar. I also chopped the pork up to make it easier to manage when eating later. As this is a derivative of somebody else's recipe, my notes will be limited to discussing the things I did while cooking.


My experience with browning things is limited to using non-stick pans, so I browned the pork in a non-stick frying pan first. I sliced off the pork belly skins and rendered them for their fat, which would allow me to not only cook the pork without oil, but also add some flavour to the vegetables I'm stir-frying later.


Cooking in a separate pan means that I can get to place my stew ingredients in the pot ready to go though.


 This is a photo of the pot prior to simmering for one hour.


One hour later, the eggs are added in and left to simmer for a further ten minutes.


I have not had rice at home in a while, so to be able to sit down and enjoy a home-cooked dinner after a day at work was definitely welcomed. There was no almost no difference in taste between the Basics and regular pork, and if you can get over the smell when handling the rashers, the savings can be significant. A few of my colleagues at work have been eagerly anticipating this; perhaps I could make this for them if the opportunity ever presents itself.


DescriptionPrice per UnitNo. of servingsTrade-up PremiumTrade-up Benefits
Streaky Pork Rashers£4.27/kg4, typically+£0.72/kgLess smelly rashers, more regular sizes.

Sunday, 11 September 2011

Bacon Jam


The Internet is obsessed with bacon. From a Wikipedia project to improve the quality of articles regarding bacon, to YouTube sensation EpicMealTime's permanent feature of bacon in every show they make, it is difficult to deny its pervasiveness in the culture that has built up from a decade or so of the Information Superhighway. About a year or so ago, a colleague of mine mentioned in passing about trying home-made Bacon Jam. Further enquiries revealed that the recipe was taken off the Internet (where else?).

As it turns out, Bacon Jam was created a couple of years ago by Skillet Street Food, a Seattle-based company burger chain which caters to consumers via burger vans. Needless to say, it captured the imagination of the Internet, and the foodie blogger community made various attempts to recreate it from their own kitchens. A Google search places Not Quite Nigella's recipe as its first result, which took inspiration from an earlier recipe by Homesick Texan. Months of procrastination prevented me from following in their footsteps, until two things happened - I acquired a food processor, and Sainsbury's dropped the price of their Basics cooking bacon to £1 for 670g.

There are two problems with buying and using the cooking bacon. One is the packs containing either rashers, or whole hunks of bacon which have not been sliced into rashers. This is easily avoidable by inspecting the packs before buying. The other is that the rashers are clumped together rather than nicely packed like the other bacon products that Sainsbury's has, making them finicky when teasing the rashers apart to put in sandwiches. We can solve this latter problem by making the whole pack into bacon jam.

The process is relatively straightforward and rather fun, and lists amongst its ingredients maple syrup, vinegar, coffee and of course, bacon. People who have completed the recipe have lauded it for its potpourri of flavours, the sweet, sour, bitter, and salty flavours all melding together and boosted by a chilli kick. Excited, I got together the ingredients, including the coffee.

The last time we did a review on the Basics Ground Coffee we went with a rather poor attempt of making a cold brew, so since we had another opportunity to try it, we brewed ourselves a cup. The coffee was pretty smooth and had a nice amount of kick to it, being made from Robusta beans, which have a higher caffeine content compared to the Arabica beans found in most blends. Surprisingly, it was not bitter, which would have been characteristic of Robusta, so Sainsbury's must have adjusted the roasting process to compensate, which kind of shows the amount of detail they put into even Basics products.


The recipe for bacon jam that I used can be found at Not Quite Nigella through the link I have above, so I shall restrict my commentary to the tweaks and other little things I did while making this. For adaptability reasons I have substituted Basics vinegar and honey for cider vinegar and maple syrup respectively. I also added a dried chilli from a pack my flatmate bought in Chinatown to add an extra kick.


The packet of Basics cooking bacon will have to be fried in two stages. If you want to you can also trim the fat off some of the rashers to form a starter batch, which would be rendered of fat in the pan for easier frying of the main bacon batches.


If you do use the starter batch, have it at the side of the pan while frying the bacon so that they can continue to render and become nice and crispy in the process. It is a lot of effort to tease out the bacon rashers before chopping them up, but if you are not planning on using a food processor to grind up the resulting jam later on, you might want to consider doing this if you want a finer-textured jam.


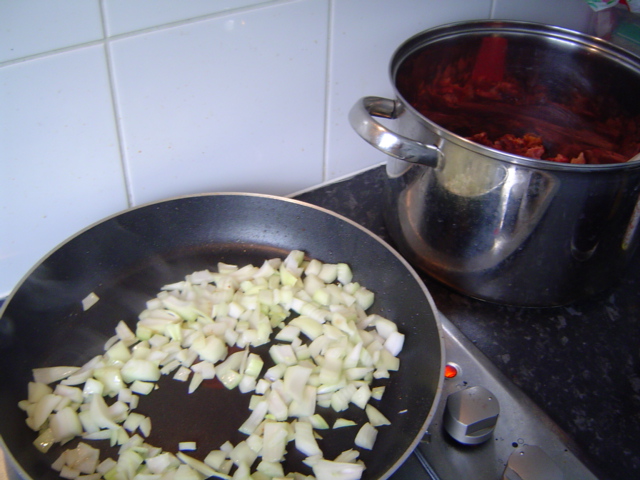
1 hour later, it turns out that I had the heat on too low, so I decided not to add any water at all and crank up the heat to mid so that I can simmer the water away more quickly. Unfortunately, 2 hours from the time I started simmering,  I am nowhere near the nice dark colour that Not Quite Nigella managed to get.


On the 3rd hour however...


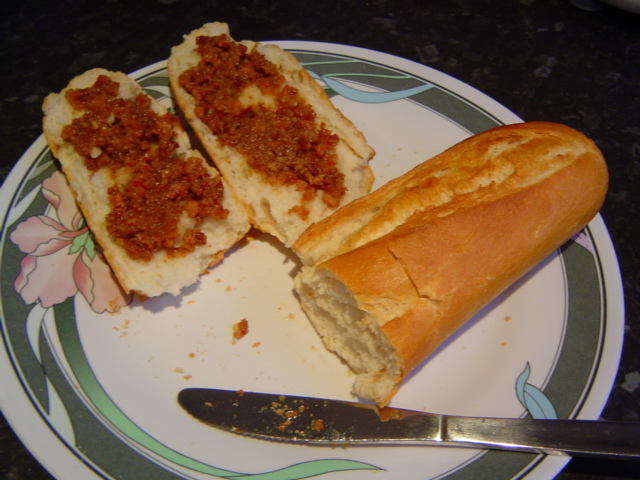
Satisfied with progress, I turned off the heat on the stove to let it cool slowly. After that, a brief spin in the food processor, and the bacon jam was ready to be spread on Sainsbury's Basics Baguette.


This was a resounding success. The bacon jam, effectively a pate, tastes great, if perhaps a little too sweet and oily, and will go well with anything that usually calls for bacon. Already I'm thinking of not just spreading this on my bread, but taking up the suggestions floating around on the Net and putting it into pastas, serving it with poached eggs, and perhaps even with asparagus, if it happens to be cheap. I might have to work out a way to not make it feel so oily, perhaps by leaving out some of the liquid from the cooking, or patting the bacon dry with kitchen towels before transferring to the pot. This recipe will nonetheless be a godsend to anybody in university who might love bacon, but want to have it cheaply, and without the fuss of carefully peeling apart randomly mashed rashers at 8.30 in the morning, half an hour before the first lecture of the day.

Sunday, 4 September 2011

Bananas - The One-Ingredient Ice Cream


My research for material sometimes involves me looking at recent food-related trends on the Internet. It is quite interesting to see what a random person has discovered that quickly catches on in the section of the blogosphere devoted to culinary misadventures. A very good example of this would be the one-ingredient ice cream recipe that The Kitchn came up with, which has since been re-posted by a good many people over the span of two years.

The idea seems simple enough - freeze some overripe bananas, peeled and sliced, for a number of hours so that they partially solidify. Toss them into a blender and blend, letting the heat and mechanical processing from the blades liquify the bananas into a lovely goo with the texture of soft-serve. Refreeze to get the consistency you would find in regular ice-cream.

Most of the blogs who have re-posted the recipe from The Kitchn don't seem to heed the re-freezing step, so I thought that this might be an interesting opportunity to recreate it as pictured in the original post. I also added some melted dark chocolate into the blend to provide a contrast against the bananas.


Due to some technical difficulties, the resulting ice-cream I made was more icy than what I was hoping for, but nevertheless, this is an undeniably fun way to enjoy (or get your children to enjoy) bananas. Given that bananas are pretty cheap at supermarkets I can see this being a dessert that students can prepare when they have guests around, and a healthy and cheap alternative to the Ben & Jerry's regularly offered at a discount at Sainsbury's. The only drawback is having to put down money for a good food processor or blender - mine in particular cost £30, but would provide returns for as long as it lasts.

DescriptionPrice per UnitNo. of servingsTrade-up PremiumTrade-up Benefits
Bananas£1.15 8+£0.22Not much.

Saturday, 27 August 2011

Tuna Pasta Bake

Sainsbury's recently ran a campaign where they offer plans for five meals that you can feed a family of four with. The second meal plan had for one of the meals a tuna pasta bake, that consisted largely of Basics ingredients. Aside from the ingredients you see above, and aside from the obvious pasta, the bake also contains mushrooms. I decided to give this recipe a little go this time as it involved something that I still have some doubts over - the Basics pasta sauce.

 While preparing the mushrooms for the bake I noticed that the caps of most of them were fully open, gills exposed. I remembered from the article about the white button mushroom and its brethren on Wikipedia that what are commonly marketed as white mushrooms (Sainsbury's included) are young mushrooms that have closed caps. Portobello mushrooms on the other hand are those who have been allowed to fully develop into giant caps of mushroom flavour. Those that go into the tubs of Basics mushrooms then are those that are neither here nor there. If you are not planning to go for presentation though, like slicing mushrooms for pizzas, and don't mind the extra effort to clean the dirt off the mushrooms, they make a good buy.

Most of the recipe can be found in the link above. For this particular one I left out the tomatoes as I didn't want to buy the fresh ones or the canned ones (too expensive, and too much liquid respectively)


The pasta sauce threatened to ruin everything, but ultimately it was the mozzarella and mushrooms which saved the day. I still don't think I can easily recommend the pasta sauce to people yet, until I can find a way to compensate for its sourish flavour. It also does not help that it does not have much actual tomato content, understandable given the relative high price of tomatoes.

Saturday, 20 August 2011

Peanut Butter Cups


A regular reader of mine sent in this link, asking if I could try doing this with Basics ingredients. Oddly enough, I do miss eating peanut butter cups, which are readily available in the States and back where I come from, but are difficult to find in the UK. And I'm not alone. My housemates and their friends are all pretty fond of the confectionery, and I have to keep that in mind when I buy some to take back with me. Indeed, once when a group of Americans asked me why I was buying a sizable supply of Reese's Mini Peanut Butter Cups in New York, I simply pointed out the lack of availability where I was based. They nodded understandingly and approvingly.

I would need some form of paper cups to put my chocolate in though. Luckily, my local Sainsbury's stocks Petit Four cases, available in packs of 100, for under a pound. It's unlikely I would be needing this very often, so I'm glad that I didn't have to pay too much for this.


The recipe was originally sourced from Epicurious, which in turn cited it from the December 1990 issue of American food magazine Bon Appetit. While following the recipe I made some improvisations and mistakes, detailed below.


Make the peanut butter blend according to the recipe instructions. The recipe called for sour cream and whipping cream to be blended into the peanut butter, but not wanting to buy a tub of each for the express purpose of making confectionery, I improvised and made the blend from one tablespoon of peanut butter and a splash of semi-skimmed milk. The effect achieved was similar, a smooth peanut butter filling.


Leave the peanut butter filling to cool for a few hours in the fridge.


 A couple of hours later, start up a steam bath and proceed to melt some chocolate.


Use a teaspoon to pick up a dollop of melted chocolate and drop it into the centre of a paper case. Use the back of the teaspoon to then line the walls of the paper case with chocolate, as shown above. Leave to cool in fridge for 20 minutes, and do not do as I did, which was to proceed to the next step without the fridging.


Drop a dollop of the peanut butter filling into each case, and seal off with chocolate. Leave to cool at room temperature before packing into a box for further cooling in the fridge.


It was good being able to bite into something that I have started to miss when my supply of Reese's ran out. I'm guessing that this would probably be most useful to the sizable population of Americans, particularly the youth, who are currently based in the UK for one reason or another, and miss peanut butter cups but are unwilling to pay the price charged by some places here for the privilege of eating them. In the meantime, I suppose this experience may come in handy when entertaining guests in future.

Thursday, 11 August 2011

Dan Dan Mian

Dan Dan Mian, or dan dan noodles, consists of noodles in a spicy soup consisting of minced pork and other tasty ingredients. Some variations would add a dollop of sesame paste, especially when eating in Taiwan or the United States. Since peanut butter bears some sort of resemblance to sesame paste, putting together a Sainsbury's Basics version using Basics Peanut Butter should work.

Or so the theory went anyway. Fortunately for me, there are some versions of the noodle dish in the States that indeed use peanut butter in the soup, so I should be in safe territory. In recent times I have been taking a look at peanut butter, intrigued about how something as cheap as that (Sainsbury's Basics' version costs 79p) can provide so many calories per unit weight (615 calories per 100g, to be precise), and wonder if it can be used for more than breakfast sandwiches and confectionery. If an university student can work out how to incorporate this into his meals, and does not mind a bit of monotony, he would be able to last that little bit longer on the same food budget.


I started off by dicing an onion and slicing up a few mushrooms. This is largely for flavouring, extra bulk and to add extra liquid to the soup I will create later.


Once that was done I heated a pan, and browned the Sainsbury's Basics mince. Because its fat content is pretty high and the pan is non-stick, there was no need to add any oil. As the fat is saturated though you might want to consider draining it off at some point. Add onions and mushrooms and continue to cook.


Add half a Sainsbury's Basics Beef Stock Cube and a healthy tablespoon of Basics Peanut Butter to the mix. Follow this up with as much chilli flakes or oil-based chilli sauce that you can willingly take.


Cook spaghetti according to instructions, but drain two minutes early. Add to the wok along with some hot water to make the peanut soup.


I was pleasantly surprised by the result. To be honest, I thought this was going to be another of those pre-planned failures involving a crazy idea for a recipe. The noodle soup was filling, and for good reason too, thanks to the carbs from the pasta and the peanut butter from the soup. Ingredient cost is also pretty low too, and could possibly go lower if you could bring yourself to use the Sainsbury's Basics Mince from the frozen section, but that's scope for another discussion. Authenticity would probably be off the mark, but it's good to know that some form of dan dan mian can be created using things from the Sainsbury's Basics line.

Monday, 1 August 2011

Chicken & Vegetable Pie


I have just returned from my break, and I am slowly getting round to my regular routine again. That includes posting regularly on this blog, although again, I am doing a slow-rolling start instead of jumping straight into cooking demonstrations that are de riguer here. One of the things I managed to stash prior to going for my break are the Chicken & Vegetable Pies shown above.

Aside from Fish & Chips, pastry pies of various sorts are deeply ingrained in British cuisine, offering warm comfort from the colder parts of the year. It's somewhat surprising though that the Sainsbury's Basics range only offers Chicken & Vegetable pie. The other pies in the range are usually potato-topped, or pork pies, which are slightly different from the pies that people outside of the UK are used to. Beef is not that expensive in this country, and in fact, there is a Sainsbury's Basics Cottage Pie, so I fail to see why there isn't a beef-based pastry pie available.

As I was feeling particularly hungry, I decided to pop two pies into the oven. Given also that I have spent two weeks eating outside of the UK, the pies were a gentle reintroduction to the food I'm used to over here.


While the pies had real chicken (making up 9% of the total pie, according to the ingredients), and had chicken stock to flavour the filling, the pie still tasted bland overall. The pastry was pretty good though, being crispy though not too greasy. The pie would probably be best accompanied by richly flavoured mashed potato, say with cheese or mustard, to make up for the blandness of the pie.

DescriptionPrice per UnitNo. of servingsTrade-up PremiumTrade-up Benefits
Chicken & Vegetable Pie (frozen)£1.004 x 121g+£1.00 for 4 x 150gHigher chicken content. Recommended.
Related Posts Plugin for WordPress, Blogger...